
* * *
Purpose
my goal is to write my own operating system and design/build my own motherboard. other than the fact that i find the whole technical process fascinating, the real reasons behind the actual commitment to do this are two fold. on the functional side of things, i am just getting tired of how big brother and big corporations along with black opps are manipulating the entire experience with regard to people’s relationship to life via their computer. however, as i have gotten into understanding the basic foundation of how computers function at the motherboard level, i have found that its principles offer a very useful metaphor for a personal understanding of the mechanics of thought. thus, i am greatly intrigued by how i see this mental/electrical/logical/physical experience can contribute to my continual quest to understand life as an opportunity for manifesting spiritual ideals. the Kabbalah indicates that there are two polarities to the flow of personalized consciousness in the human experience. these are experienced as the masculine and feminine principals which carry through and permeate the whole fabric of life by such factors as right and left brain hemispheres, good and evil, positive and negative polarities, life and death and so on. and as one finds himself or herself entrenched in any of the many cul-de-sacs of life’s pathways, the mental experience is always along for the ride… trying to fathom at least some of the ‘who’, and the ‘what’… it was that got the self to some present ‘now’… ‘wherever’ that may be… in order to find some of the ‘why’ of it so that maybe some ‘tomorrow’ might be more agreeably different. yet… according to the Edgar Cayce readings, the mental experience is NOT just along for the ride, it is actually the builder of the many experiences that we find ourselves experiencing – namely, if we change our thoughts, then different scenarios will follow in our life experience.
so, in continuing a bit here with the philosophy of what intrigues me in doing this, the Kabbalah indicates that the masculine principle is a giving, sending projecting expression and does not really know ‘what’ it is sending or projecting until it is received by something and is reflected back. whereas, the feminine principle is one of receiving in order to give. sort of like with the moon in that it has no light of its own. mind you, these are defined specifically here as ‘principles’ as opposed to embodiments. however, a lot of male and female embodiments do tend to excel better in one of these definitions over the other. but persevering here, a good way to example the male principle at work is to take a good flashlight outside on a dark clear evening when there is no mist or fog or dust in the air. point the flashlight up into the air and turn it on. what do you see? well… absolutely nothing. it is enough to make you wonder if the flashlight is even working! but, if you bring down the flashlight and point it at a tree or a dog or a building… then, presto! you immediately see the light reflected by the object which tells you that the flashlight is indeed working. thus, in human terms, this is a good way to explain why men are often so controlling of women, because they are desiring that the woman reflect back the energy that the man finds appealing to his ego. however, the female expression has the creative freedom to take the light shown her way as the gift that it really is and do whatever she wants to do with it. thus goes the dance between the principles of giving and receiving and reflection.
i bring this all up for thought because the Kabbalah goes on to say, that in life, there would be no understanding if it were not for this feminine principle, that it is precisely this ability to absorb and possess incoming energy for the purposes of determining what and how to use it that makes it even possible to fathom what is being received. a good example is that of the prism. one beam of light enters the prism, yet seven different colors of light exit the prism. thus, the original beam of white light can now be more fully understood via seeking to understand each of its colors – its various parts. no different than the investigator who disassembles an object in order to understand how it works, and or, in order to reconstruct it so it works differently.
and what does this all have to do with 8-bit computers? well… in the early days of 8-bit hobby and home computers, there was no real defined ‘motherboard’. rather, the ‘computer’ was just a collection of pieces that produced logical functions. the old original computers had a dozen or more integrated circuit chips that did a number of different things. you had a CPU (a central processing unit) that was responsible for the center of all thought goals and decision making which decided what the computer was supposed to accomplish. however, in those early days, all the memory were separate chips, how the data was transferred between the thoughts and the memory was handled by other separate chips, how the brain communicated with the outside world such as printers and keyboards and video screens and tape drives and such were handled by other chips, and also… the timing of all the electronic signals that formed the basis of how all these chips communicated with one another was handled by another chip or chips. thus, in those early days, the end user had the option of deciding and being creative about all of this thought construction and its relative timing – literally. and it is this ability or opportunity to take thought and break it down into all kinds of differing potentials and processes that totally intrigues me. we all tend to be way too automatic in how we think and react to life and its circumstances. so the idea of being able to slow it all down and place communicative priorities to how potential information is accumulated and valued leads me to believe that there are different ways to access thought and circumstance. one of the biggest detriments to being a human being has to do with the impatience that we so impulsively apply to life and things. in todays computers, all of the above mentioned ‘pieces’ are pretty much all combined into one chip. there is no variation to how one might construct communicative thought if one were desiring to contemplate options about how they actually do construct their thoughts. and to me, the ides of being able to slow everything down to the point where i can observe just one thought by itself is fascinating. because with each thought, and each choice in life we predicate our whole potential future. and most all of us do such things out of habit instead of via true thoughtfulness. is not that what meditation is all about? going inside and becoming still? and taking the simplest moment to task within itself in order to discover our relationship to the author of life itself? sooooo… i see this old technology as a way to externalize how it is that i think in such a way as to be able to observe how it works with the hope that i get or see differing ideas about how such things as thought and memory and timing and communication can or might be shuffled around. that maybe, in doing so, i might find some symbolic metaphors on how to rearrange such processes or priorities, and thus learn something about myself and life.
in a very short forty years, the personal computer has not only revolutionized one’s daily life, but it is now in the process of revolutionizing itself. in the mid 1970’s the concept of a personal computer had not even been born yet. there was no existing meaningful or useful commercial activity for it in the market place. therefore, the industry which was creating the components knew its potential and seeded the marketplace with volumes and volumes of documentation about how all of it worked. this led to many people inventing ways to use it. home brew computer clubs sprung up. magazines were born discussing all kinds of ideas about how and what to do with these things. word processors were born, electronic games started consuming people’s evenings, electronic checkbook balancing became an option along with an electronic thesaurus and so on. but once a real commercial market became a reality, then the big corporations stepped in and took over the whole show – both its use and its creation. as that happened, individual entrepreneurial creativity came to an end because the driving force was always the commercial window or purpose. and, in business, the bigger guy always tends to step on and force out the little guy. and, the central design of the computer and how it works has become so streamlined and so pipelined that it has lost all of its foundational creativity in exchange for power and speed.
thus, i just see that going back to the basic beginnings will allow me to chart my own course in terms of how and what is possible with this technology. furthermore, ALL of the documentation, the early chips, and pieces that made your ‘own’ computer possible are still sitting around in peoples basements, attics and storage rooms. and because of ebay, i can (and have) been going around and collecting ALL of it for pennies and sometimes fractions of pennies on the original dollar. so over time, the ensuing pages will document what it is that i am learning and discovering within this quest.
* * *
The MMD-1 and The MMD-2
in the mid 70’s there were a number of books written about how the basic integrated circuit chips could be arranged into a useful manner that would function as a computer – something that would allow someone to input data, have the CPU instruction set Do something with the data and then out put that data in a meaningful form. one of those early books was literally titled “From Chips to Systems: An Introduction to Microprocessors” by Rodney Zacks – 552 pages of instructional information. another such book was “How To Build Your Own Working Microcomputer” by Charles Adams. and there were many other such books. and… in my quest to really get into this experience i have bought every different one that i have been able to find. as i have already said, the industry which produced these chips published as much information as they could in order to stimulate a commercial market and demand for what they were making. and i have found that each author has taken that information and documentation and written books based upon their learning experiences. thus, to read each one gives me a richer and more diverse feel for the potential possibilities of the technology. one of the most memorable works along these lines was a series of books called the Bugbooks that were written by collage engineering professors at the Virginia Polytechnic Institute & State University at Blacksburg, Virginia. they wrote a series of eight books that took the aspiring computer creator all the way through a discussion of the TTL logic chips, the CPU itself, the memory, I/O chips, how to write assembly language code and how to interface your computer creation to the outside world. all their books had the word “Bugbook” in the title which was a creative reference to the fact that the little integrated circuit chip sort of look like little black bugs with 4 to maybe 14, or 18 or even 40 little feet. they even had pictures of little bugs on the cover of some of the books. furthermore, one of the professors created a sample possible computer known as the Mark-8 which used the Intel 8080 CPU and allowed the user to input simple assembly code instructions. this became one of the earliest SBC’s – Single Board Computer. the Mark-8 was never officially produced and sold, but its creator Johnathan Titus made a complete set of plans and the ‘how to do it’ available for free to anyone who was interested. well, many people WERE interested and it was a big factor in what led to the whole Bugbook series. in fact, how to do microcomputer interfacing with the Mark-8 is what the entire Bugbook III is about. there is much available online if someone wants to read up on it all, and a sample interview of Johnathan Titus and the Mark-8 can be found at this link: http://chc61.fgcu.edu/titusinterview.aspx
so, to move along here, the professors at Blacksburg eventually teamed up with a company out of Connecticut called E&L Instruments who is still in the business of making and selling digital computer training devices under the name of Global Specialties. but the stuff these guys made in the mid 70’s and early 80’s was absolutely the best stuff available in its day. that company actually pioneered the whole concept of digital computer training for both the hobbyist and the engineering student. and, in teamwork with E&L Instruments and through the Bugbook series, the Mark-8 grew into the Mini Micro Designer – a fully functional, factory built computer trainer based upon the Intel 8080 CPU. this could be purchased fully built or as a kit that you soldered together yourself depending upon what kind of a learning curve you wanted. the first of these was called the MMD-1 and was followed by the MMD-2. i have three of the MMD-1’s and two of the MMD-2’s. they were many hundreds of dollars back in the 70’s, but i have gotten an MMD-1 for as cheap as $20 plus shipping off of ebay, and $160 is the most i have paid for an MMD-2. as i write this now, there is an MMD-2 for sale on ebay for $338 which is in bad shape and only good for parts. so you have to watch what you are doing because the world is full of ‘collector freaks’ who are always messing up a good thing for an absolutely no-good reason other than hording something they usually do not understand, have no intention of using – and they drive up the prices for the ‘real’ people who actually want to make something out of life. but at this time there are still enough ‘real’ people out there who put these things up on ebay and allow them to be sold for a reasonable bit price. anyway, enough of my rant against collectors.
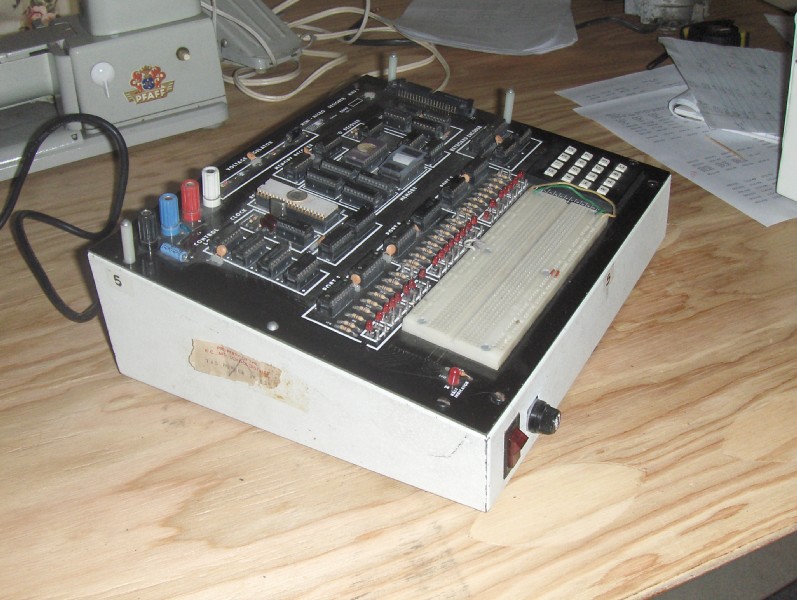
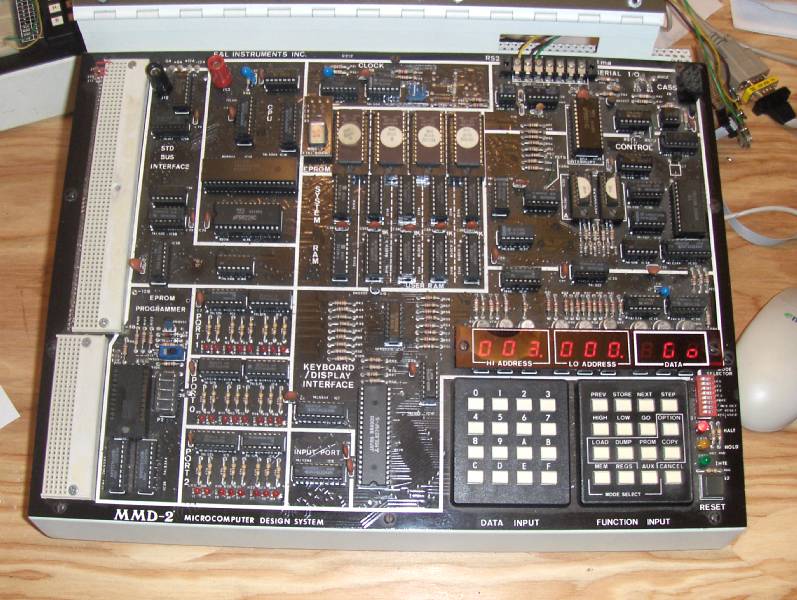
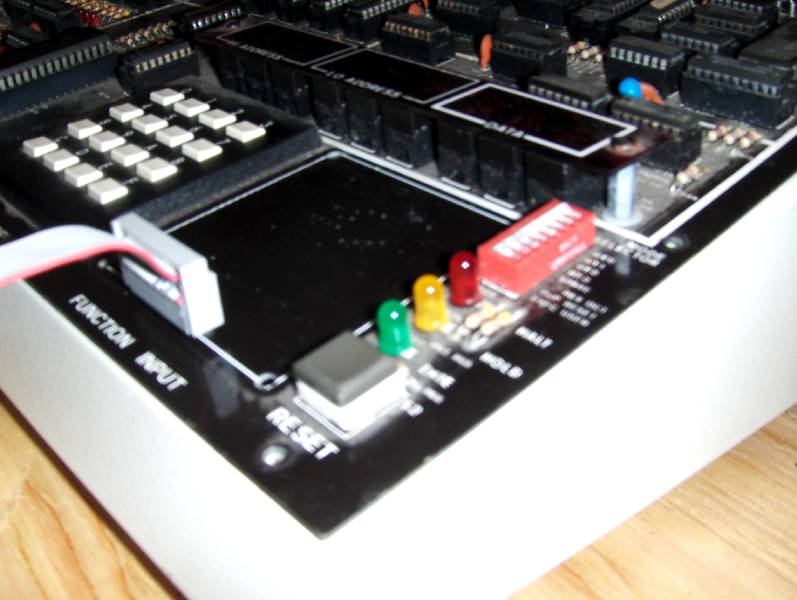
soooo… the following pics are of the MMD-1 and the MMD-2. as you can see, the MMD-1 is really a bare bones computer trainer. it has a simple keypad, a small amount of memory, two EPROM sockets, the CPU, three output data ports comprised of LED’s for binary display, a forty pin interface cable connector and a solderless breadboard for interface and electronic signal experimentation. i used this for a couple of weeks until i got the itch for a more robust experience and switched to using the MMD-2. i am so used to sitting at a computer and communicating with a keyboard, looking at a screen for what is happening, and saving my experience to a disk drive, that the MMD-1 as a foundational learning device was just too primitive for applying my present zeal to learn something. it is sort of like working on old cars. at first you want to just drive one around the block, or to the movies or to the next town and back. once you can do that, THEN parking it in your garage and taking it apart to see how it works offers more meaning and a greater sense of purpose. and so it is with this computer experience that i am having. the whole goal of this for me is to be creative with Thought! so i found that i needed to be able to get to a place where my thoughts were flowing. THEN i will have a better appreciation for how to Mechanically decide how those thoughts are constructed and can flow. thus, moving on to the MMD-2 was the thing for me because it has everything that the MMD-1 has – Plus an already existing RS-232 interface for a teletype or an electronic terminal, a cassette tape interface for program storage, a seven segment LED digital display arrangement along with the 8-bit binary LED display, twice as much RAM and Eprom capacity as well as an Eprom Programmer, a larger and more powerful system monitor program residing in the provided Eproms, an expanded keypad setup which allows for use of the larger system monitor (computer trainer operating system) for such things as adding break points to your assembly programs and finally an fully functional STD Bus interfacing arrangement! so that adds soooo much more instant capability to my current studies and overall learning experience that my learning zeal is feeling the necessary sense of meaningful gratification, reward and validation for where and how i want to mental grow in this experience. once i get to a comfortable level of a validated mental expression, then i will want to go ‘backwards’ in the direction of the chip level design of my dream motherboard and potential flow of logic. but for now it is enough to have a foundation that allows me to experiment with the basic instruction set of the CPU so that i have a good feel for the kinds of thoughts that are possible and the mechanics of how the CPU makes such thoughts available – which is quite different than the normal process of manifesting thought. sooo, probably obviously enough, the first pic is of the MMD-1 and the second is of the MMD-2.
* * *
Virtual Disk!!!
as i got started writing my first assembly language programs i was really feeling the limitation of not being able to store my efforts from one session to the next. every time i wanted to mess with some routine, i was having to re-enter it. or… if i wanted to use a subroutine i had written earlier, i had to also re-enter it. then, if i was done for the evening, and i turned off the MMD-2, i had to start all over again. i had purchased an old Radio Shack data cassette recorder for the purpose of storing my programs. but everything that i have ever read about using them said that they were quite frustrating to use. plus, they only offer a linear sequential save and restore option which is not only cumbersome, but slow. i am really use to having a either a floppy or hard disk drive for program and data file storage. soooo… i decided to investigate just what the STD Bus interface option might be able to bring into my world. i had bought enough stuff off of ebay to know that STD Bus items were readily available. wellll, that turned out to be quite a fun quest, and i ended up buying a whole bunch of fun stuff. i won’t take time the time to explain too much about STD Bus here, except to say that it is widely used by and for industrial applications because of its flexibility. your whole computer system is comprised of a rack with anywhere from about six slots to twelve or more. each slot accepts a small board with edge connectors that plug into a back plane that is powered by a power supply that comes with the rack. this arrangement allows you to assemble in a building block fashion whatever kind of a computer system you are desiring. common industrial applications are for such things as machine control for automated equipment. thus, you can plug in a CPU board that can either be an 8085, or a Z80 or a Motorola 6800. then you use other slots for optional needs such as expanded memory, UART communications, a disk drive, a network card, stepper motor control cards and so forth. so i went looking for a disk drive card that i could simply plug into the side of my MMD-2! but i did not find one for much under $200 and there was no manual with it in order to figure out how to interface its use to my Intel 8080 CPU with no built-in operating system to handle all the necessary interrupts. HOWEVER! i did find me a Pro-Log 7706 16K Battery Backed Ram (memory) Card for only $29 including shipping and handling! others on ebay were anywhere from $50 to $175. having a battery backed ram card means that whatever i store in it will remain alive after i turn off the MMD-2 as long as the battery is in good shape. Plus! i found a manual through another source for only $8. therefore, i could know exactly what i was doing. the board comes with jumpers which allow you to set the memory address for the 16K of memory which is Great. the 8080 CPU has a maximum of 64K of addressable memory space. thus, the board came with the ability to map which 25% part of that 64K the memory would appear at to the CPU – which part of its brain would come alive. so i did my homework with the MMD-2 and learned which part of the 64K the MMD-2 was already using, then mapped the RAM Card to a vacant place in the map, plugged the card into the MMD-2 and turned her on. and, PRESTO! i had another 16K of memory! but NOT just simple memory because of the battery backed feature which turns the card into a Virtual Disk that retains all of its data after i turn off the MMD-2. so that gives me the option of permanent storage! this was such an exciting experience because it elevated the potential of my learning curve so dramatically. and another feature of the card is that it has four dip switches that allow me to write protect various parts of the 16K in 4K chunks that will protect the stored information from random program activity, glitches and programing errors by me. but electronic glitches will always be a concern to the volatile nature of the stored data. soooo… for that concern, i will have to be somewhat disciplined about having a backup schedule of all valuable data and programs to the cassette recorder. i keep printed copies of all my programs as my ultimate backup.
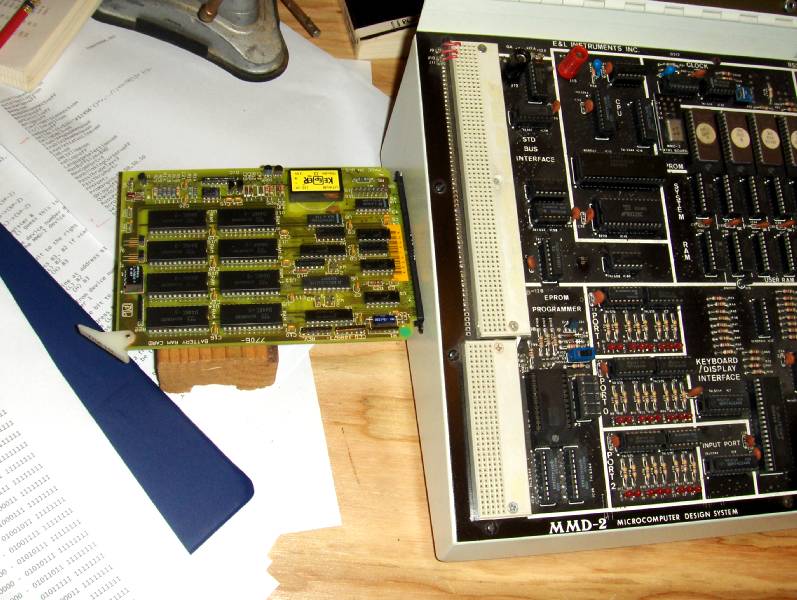
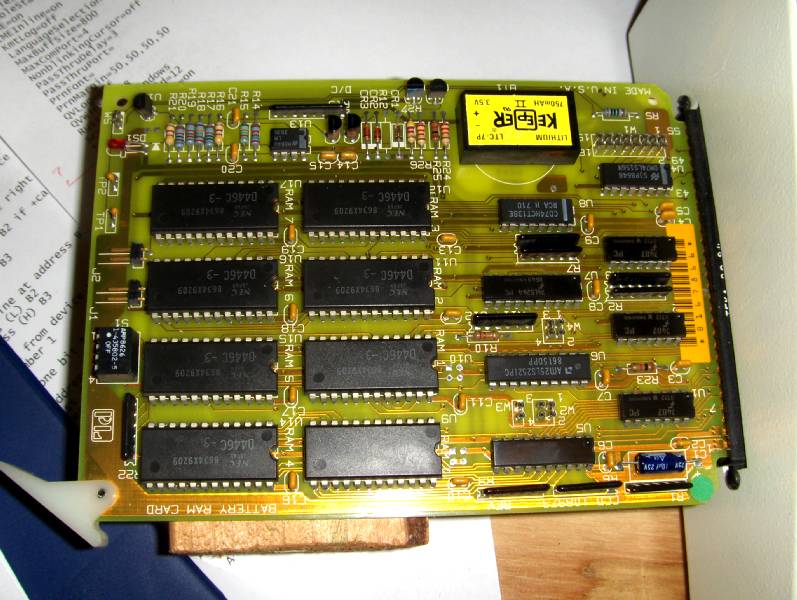
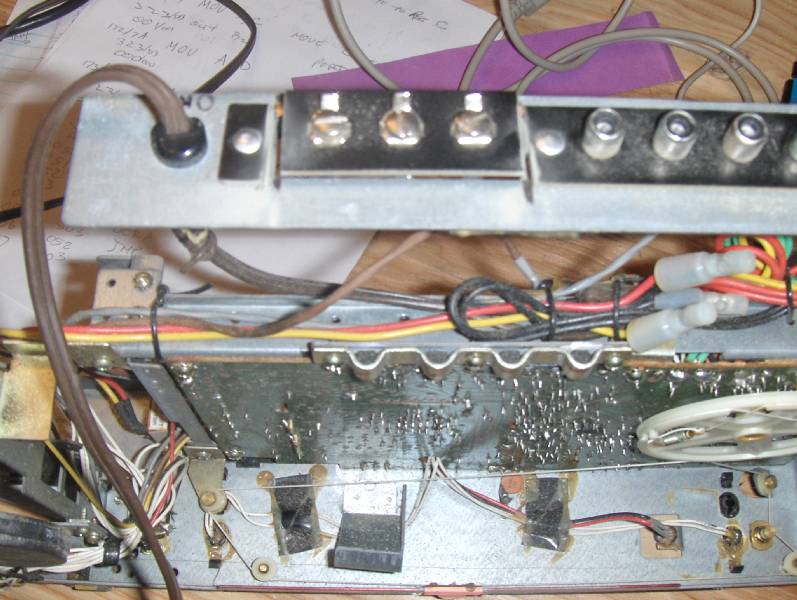
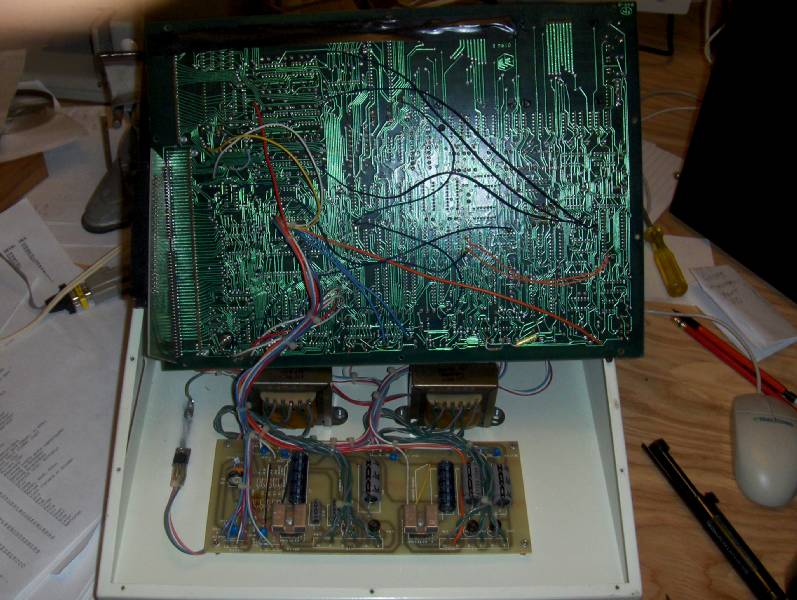
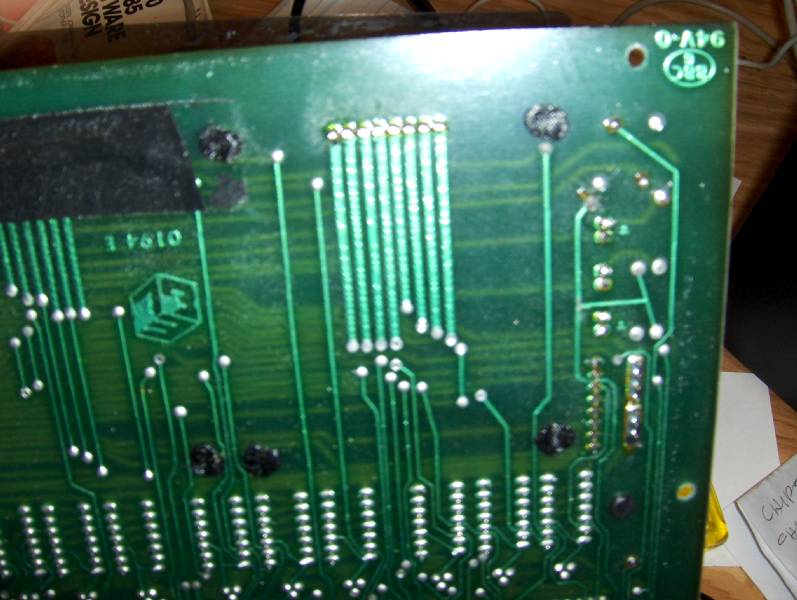
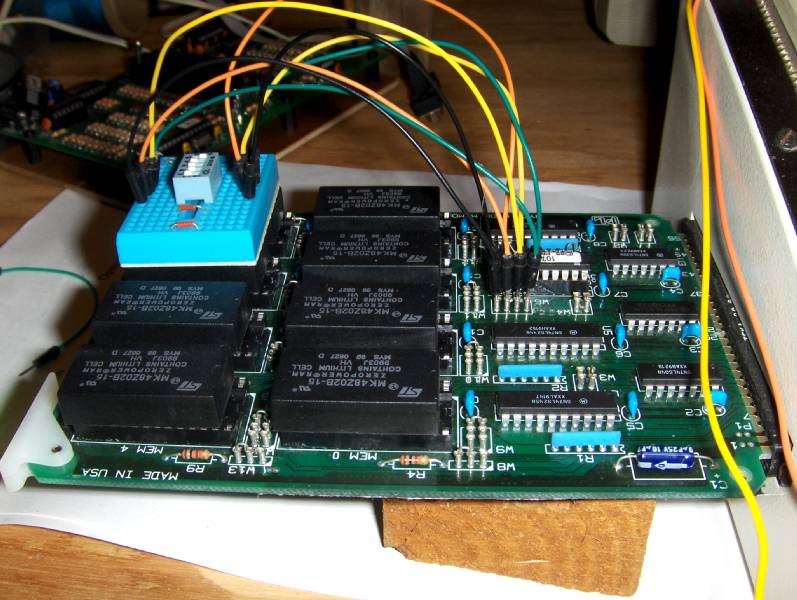
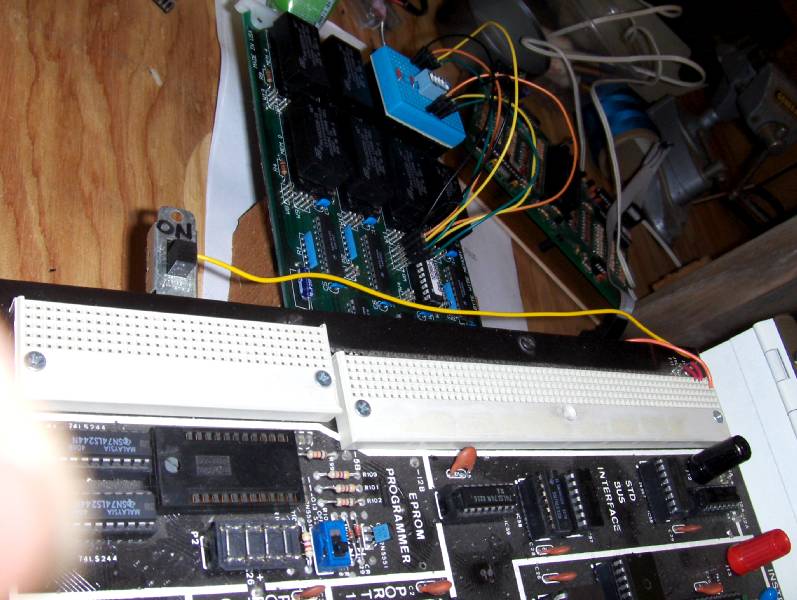
the following pics are of the MMD-2 and the battery backed RAM card. the battery was worn out when i received it, so i bought a replacement one for $17 and soldered it in. so a couple of the pics are of that activity. the battery is that yellow rectangular object. the replacement battery is just plain black without the yellow sticker. the manual says that a new battery will protect data in memory for a minimum of two years and typically for five years.


* * *
ComMuniCAtion!
my next quest was to get to where i could use a full keyboard and have a screen to view my input and output. this is something that we all take for granted these days, but if you are building your own operating system, that is just one of the abilities of the system that you have to create. the MMD-2 comes with two keypads. one keypad is for entering data which is just numbers which make up the instruction codes for the 8080 CPU. you can either enter these numbers according to the octal based numbering system – or numbers based upon the hexadecimal numbering system. the numbers that we are use to using is called the base 10 system and has ten digits (0 – 9) per an accumulative cycle – meaning that its first digit of the second accumulative cycle is a 1 and a 0. the octal, or base 8 system has only eight digits to each accumulative cycle (0 – 7) – with its first digit of the second accumulative cycle also being a 1 and a 0. the hexadecimal system has 16 digits with some letters mixed in in order to occupy 16 digits in our linear mind. thus, its digits are 0 – 9 + an A, B, C, D, E, E, F to complete the first accumulative cycle – with its first digit of the second accumulative cycle also being a 1 and a 0. i have taken the time to express this in order to explain the fact that the letters in the data entry keypad of the MMD-2 has nothing to do with entering words. the data entry keypad (the left keypad of the two) is only for entering numbers. thus, if you are communicating with the MMD-2 via the octal numbering system, you only use the top eight keys of the keypad. if you are communicating with the MMD-2 via the hexadecimal numbering system, you then use all sixteen keys of the keypad. thus, you cannot use words – there is no verbal way to communicate with the MMD-2. if you want to have that communicative ability, you then have to teach the MMD-2 how to both read and write! :) which is not yet… even what this section is about. this section is just about telling the MMD-2 that there is such a thing as a keyboard and a screen and getting that much of it to work. just what the keyboard and screen say or report will be another whole deal.
while i am talking about the keypads, i will explain the keypad on the right. it is for controlling, performing housekeeping functions with the codes that you enter on the data keypad. the operating system that comes with the MMD-2 has some already existing software that allows you to store the number codes, advance forward and backwards in terms of the computer’s memory of the codes you have already entered or want to enter, begin execution of a group of codes (a stored program) and to stop a program while it is running.
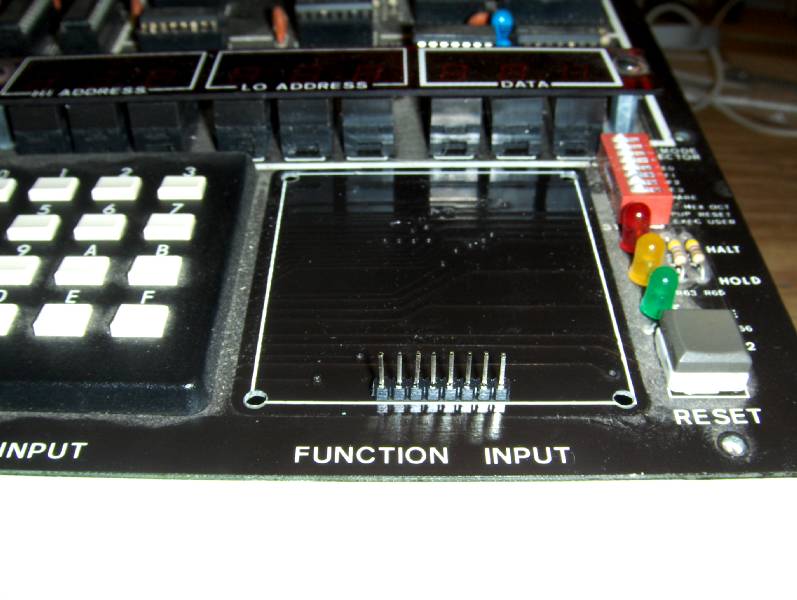
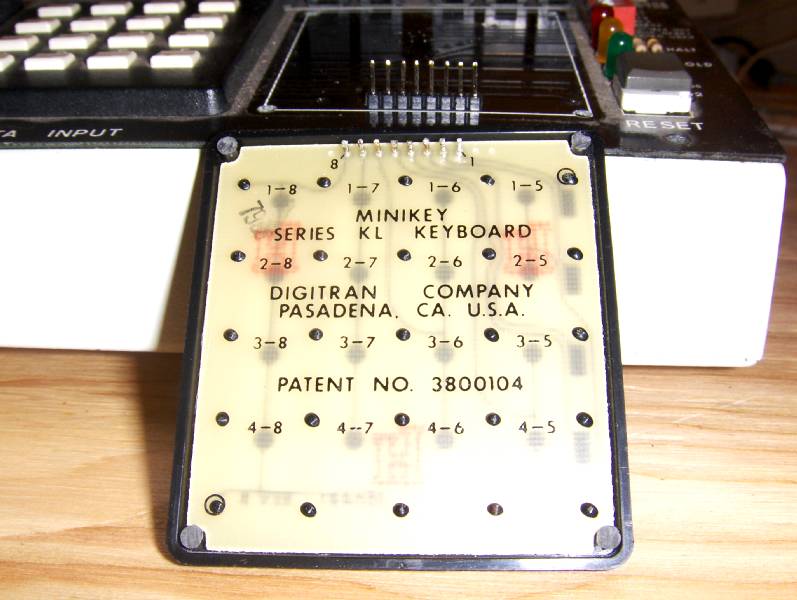
furthermore, the MMD-2 came with the ability to communicate with a teletype via a current loop connection, or a terminal which electronically emulates a teletype via an RS-232 interface. thus, i was not really faced with having to get that handshake worked out – only activate it. but to activate it, i did have to adapt what i was going to hook to the MMD-2 so that the MMD-2 knew that it was happening. however, what to exactly do about will still be up to me. therefore, the following pics are showing what i did to initialize this connection.
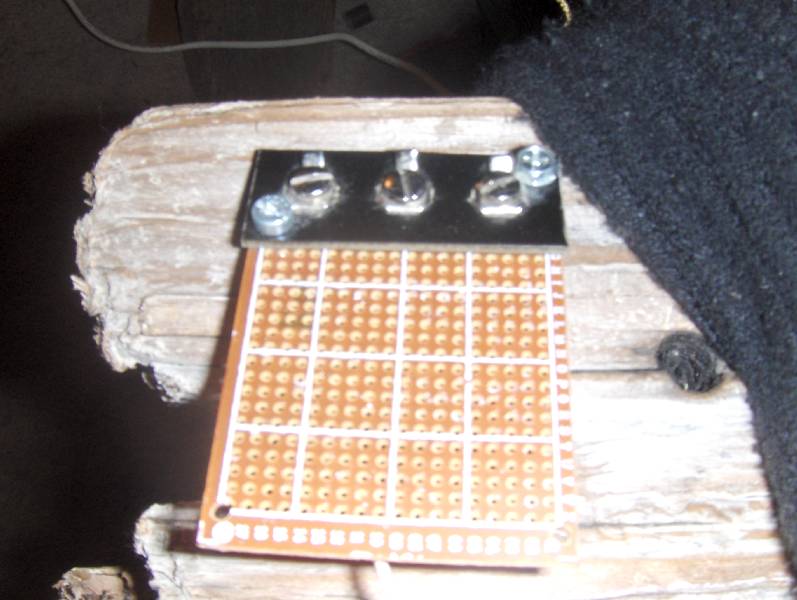
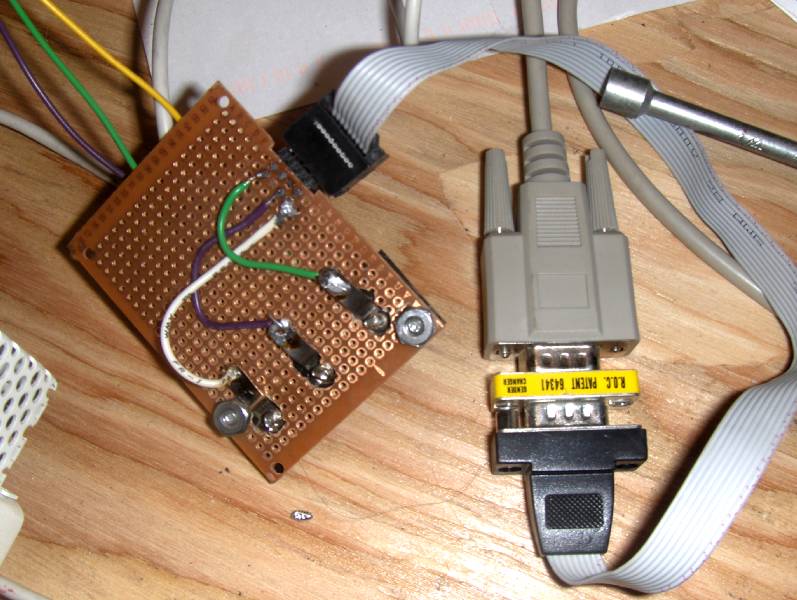
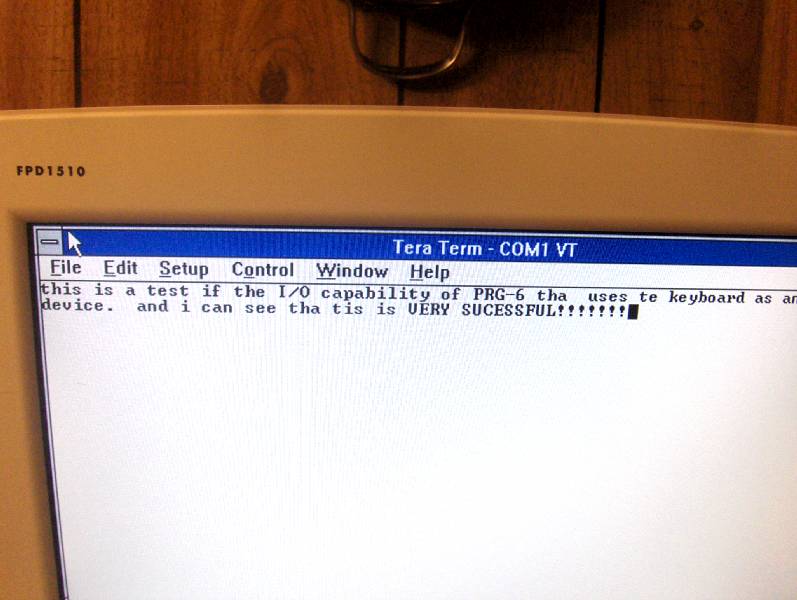
i chose to use the Tera Term program that came with the DOS based Windows 3.1 operating system in 1992. this allowed me to use a more modern VGA flat screen monitor instead of an old original CRT that had a cathode ray tube shooting radiation in my face. and to do that, i needed the ability to go from the MMD-2 interface connection of an old fashioned three screw terminal block to a Db 9-pin serial port on my computer. in order to do that, i took a part of a terminal strip out of an old Radio Shack AM/FM radio and attached it to a small PCB board. i also soldered a ten pin header to the PCB so that i could attach a ribbon cable that had the Db 9-pin connector on its other end. thus, the pics below demonstrate that activity as well as the success of that process by being able to view words that went from the keyboard to the MMD-2 and back to the screen. that was pretty exciting to see that happen even though it really only amounts to a character by character echo of each individual key that i am hitting on the keyboard. what that message (or ANY message) that i would type means absolutely NOTHING to the MMD-2 at this point. as i was explaining above, teaching the MMD-2 how to understand that and do something intelligent with it will be my next project.
The Assembly Language Code – First Terminal Response
i am posting the code here which made for this first success in getting the shown terminal response in the above photo. what it is that i am posting is much more than what i enter into the MMD-2. the colum that is titled 8-Bit Octal/HX Instru is the colum that i actuall enter – and, more specifically, the three digit numeric codes on the left side of the “/” (forward slash) because i use the Octal approach to communicating with the 8080 CPU. the two characters to the right of the “/” are what i would enter if i were to communicate via the hexadecimal numeric number system.
PGM-6
2/3/15
* This will perform simple I/O (Input/Output) ASCII communication using the Tera Term
terminal prgm as the output destination from the CPU and the keyboard as the Input
device to the CPU destination.
8-Bit 8-Bit 8-Bit
Octal Octal Octal
/HX /HX /HX
High Low Instr Mnemonic Comments
Call Subroutine TTYIN from EXEC_C Monitor program
003/03 000/00 315/CD Call
003/03 001/01 042/22 Data /Register Low (L)
003/03 002/02 343/E3 Data /Register High (H)
003/03 003/03 376/FE CPI
003/03 004/04 015/0D Data B2 /Test for ASCII Carriage Return code
If Carriage Return jump to end of program
003/03 005/05 312/CA JZ /Jump if Zero to address B3,B2
003/03 006/06 016/0E Data /Register Low (L)
003/03 007/07 003/03 Data /Register High (H)
If Not Carriage Return, call subroutine TTYOUT from EXEC_C Momitor program
003/03 010/08 315/CD Call /Call subroutine at address B3, B2
003/03 011/09 141/61 Data /Reg Low address
003/03 012/0A 343/E3 Data /Reg High address
Then Loop back to the begining (Do it all again)
003/03 013/0B 303/C3 JMP /Jump to address B3, B2
003/03 014/0C 000/00 Data /Reg Low address
003/03 015/0D 003/03 Data /Reg High address
003/03 016/0E 166/76 HLT /Halt program
* * *
Keypad Maintenance
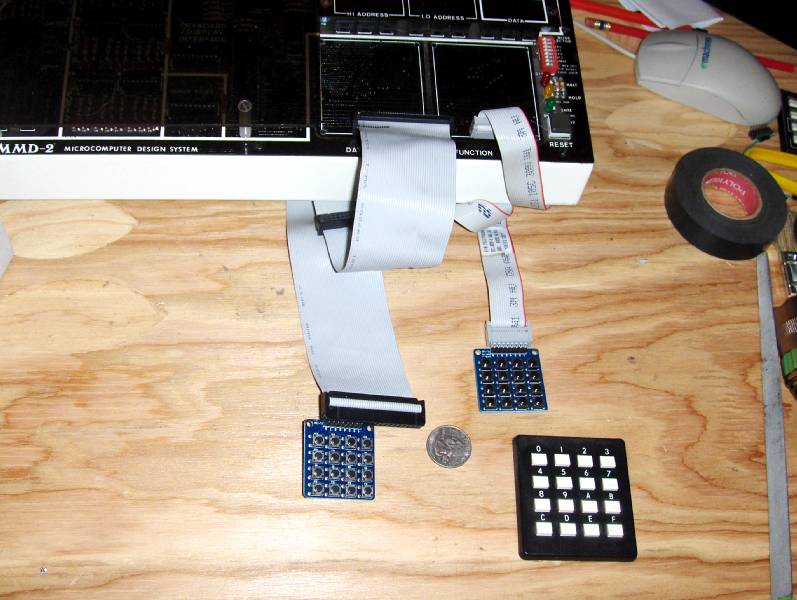
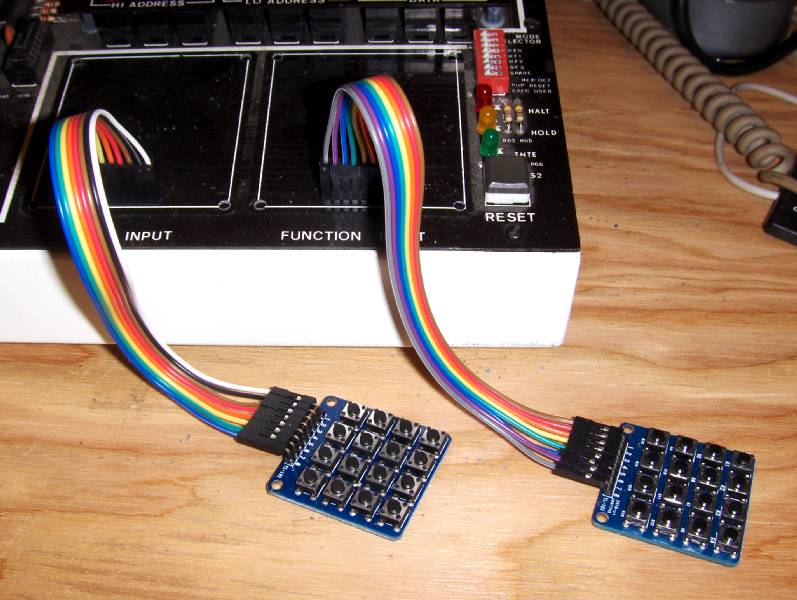
i was having a lot of issues with my keypads – mostly with the control keypad. so i bought a couple of eight contact 4×4 matrix keypads and installed them. the membrane on the stock keypads seem to be really thin and the contacts gave me the impression of not being reliable. i also decided to replace the 74LS32 Quad 2-Input OR chip and the 8279P-5 which is a 40 pin Programmable Keyboard/Display Interface. while doing these things i noticed that the back side of the large PCB for the MMD-2 had a strip of black electrical tape protecting the solder points along the lower edge of the metal project box. however, this tape stopped just before the existence of the control keypad. so, in case there was some shorting of the keypad signals against that metal edge, i extended the tape so that it covered those contacts.
the stock keypads had its eight contacts protruding downwards into eight solder holes in the PCB. i did not readily find any keypads available with that connection configuration. furthermore, i did not want to resort to another thin membrane keypad. so i settled on a keypad that had a good perceptible tactile feel to them so that i felt like there was a real positive contact experience when depressing an individual key. the old keypad had black plastic feet that had protruded through holes in the PCB and then melted on the bottom side of the board to keep them in place. thus, removal of the old keypad necessitated grinding off the melted portion of the feet. in order to facilitate an installation of my chosen keypad i soldered in an eight pin header strip into the stock keypad holes which were at that standard 0.10″ offset pattern. as you can see by the photos, that allowed me to use standard ribbon cable to connect to the keypad which also had a set of eight 0.10″ header pins. the ribbon cables that i had available in my ready stock around here was a 16 pin cable with a double row of eight pins as well as many IDE 40 pin cables. so, with the use of the 16 pin cable i just had to make sure that i was properly orientated in order to get the same eight pin contacts at either end of the cable which basically meant that i had to be conscious of using either the upper or lower eight pin connectors. with the 40 pin cable i had the same concern with the added knowledge that i had to be sure i was orientating the pin selection from the same end of the double row of 20 upper and lower pin choices. at first this project did not seem to solve my problem, but i am not sure if that was before i noticed the lack of black electrical tape underneath the control function keypad. so, who knows, that might have been the main problem all along. but i also changed out the data keypad because a few of those keys would give me two or three responses from just hitting the key once – no matter how careful i tried to be. the biggest problem i had with the control keypad was that the ‘Step’ key (step to the next memory register location) would not respond, acted like a dead key. but i am quite happy with the increased tactile feel of these keypads and have ordered some replacement ones that have more vertical separation between the rows of keys which should make getting my finger to the right key an easier proposition. i also have some nicer looking ribbon cables on order from China. so at a later date i might add photos of those changes. actually, i just started using the eraser at the end of a wooden pencil to push the buttons – it works great. but, i added some shorter ribbon cable to the keypads and that has made everything cool.

* * *
Virtual Disk Update
there has been MANY delays to my being able to actually enjoy the benefits of the excitement of having this Virtual Disk. there has been a delay of a few months due to technical issues, learning curves and waiting for parts to arrive – sometimes from China. but the result is now better than i had imagined and the story is as follows:
i had nothing but problems with that Pro-Log 7706 card. it had ESD (electro static discharge) damage and did not function very well. i could write to some registers but not to others. so i emailed the seller and he was very nice about it and sent out a replacement. but that one was even worse. in the meantime i found a Pro-Log 7704 card on ebay that i was able to purchase for only $20. so i bought it to prove to myself that the problem was the 7706 and not my MMD-2. but the card was band new and when they were originally shipped by the factory (Pro-Log is no longer in business), they ship them without memory chips. thus, i had to research what kind of memory chips to buy and then, of course, buy them. welll… the seller promised me they had been shipped even though there was no tacking response with USPS. and some three weeks later, as my excitement to proceed with my programming learning curve was shrinking, those memory chips actually arrived! however, 60% of those chips turned out to be non-functional also. but i was able to reset the Pro-Log 7704 with jumper settings so that i could then test the memory card with the MMD-2 – and SUCCESS! was obtained. i was able to prove that the MMD-2 was in fact communication as it should and could deposit data onto the 7704 which then proved that the 7706 cards were in fact faulty.
ascertaining the problem that i had dysfunctional battery backed memory cards, did not, however, give me the virtual disk that i was craving to have available to me. so i set out to design my own battery backup scheme for the 7704. i got pretty far with the concept by using 74xx logic chips to test for the presence of the 5V signal from the MMD-2… and using a relay to enable a couple of parallel 9V batteries that were regulated by a 7805 regulator. i even purchased the parts and was laying out a homemade PCB that i was going to install as a daughter board on a 7704. but somewhere along the line i became aware of the fact that there was such a thing as a MK48Z02 CMOS 2Kx8 bytewide memory chip that had its very own lithium battery with a factory self life expectancy of anywhere from 7 to 20 years! so i purchased ten of them from China to see how that would work for me. once they came and i had them installed i was both happy and sad because they worked sooo well, that i chose to abandon my battery backup design project that i was becoming proud of.
the last segment of this story is that i had begun to notice that there was some kind of a random electronic function that would somehow scramble all of the SRAM. thus, everything that was not stored safely in an EPROM would be lost whenever this happened. so that was quite un-nerving to my virtual disk hopes if i was using that as long term storage of my assembly language programming efforts. sooo, to counteract that phenomenon, i sourced where the 5V feed was to the 7704 from the MMD-2. i then installed a switch into that circuit so that i could turn the 7704 card ‘ON’ and ‘OFF’ at will. this was good for keeping the SRAM safe when i turn the MMD-2 on or off. but that would not protect its SRAM during a run time event of random electrical happenstance. therefore, because the 7704 comes with an array of jumpers that allow you to segment the memory on the card down to 2K blocks, i chose to design a daughter board that has four DIP switches that give me the option of having 8K of SRAM turned off while having another 8K of SRAM turned on. this means that once i have finished my assembly language program for transferring memory around, that i could have 8K active and 8K protected when using the MMD-2. this concept is now in place and works Great.
* * *